In this tutorial we’ll walk you through the necessary steps on how to set up automatic backup in windows 10.
What you will need:
- You’ll need a hard drive (like this 2TB hard drive available on eBay) to store your backups on. An external hard drive is recommended so that it can be removed easily and stored in a safe place if required. You can use an internal hard drive as well but be warned that if your PC is in some way damaged, then your back up data will be gone as well. Best practice is to keep your backed-up data in a separate location to your main data.
Set up Automatic Backup in Windows 10
Step 1
Windows 10 comes with a built-in backup. All you have to do is set it up and you’re good to go. To get to the backup setting, simply hit the Windows Key + I, or just type settings in the search bar and select the Settings App from the search results. Select Update and Security.

Step 2
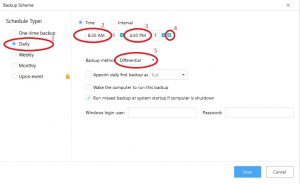
Select the Backup options from the left menu

Step 3
There are two types of backups you can make from here.
-
A System Image is a backup that makes an exact copy of your computer as it is at that point in time.
The System Image backup was introduced in Windows 7 and has carried through to Windows 10. This backup option cannot be automated and therefore is not covered in this article. However, if you are looking for this option, you find it by clicking on Go to Backup and Restore (Window 7), under the Looking for an older backup? section.
-
A File History backup is a backup of your personal data (folders and files that you can select).
The File History backup is the one we will be discussing further. Now plug in the hard drive you want to save your back up to. If you are using an internal drive, you can skip this step.
Step 4
You’ll need to select the hard drive where you want to make the backups to. Click (1) Add a drive and then (2) select the drive you want to use.

Step 5
Notice that the Automatically backup my files button is set to on. You can turn this off if you want to stop your automatic backups at any time. Now click on More Options.

Step 6
Here you can set the backup frequency, how long to keep the backups for and select folders you want to include in your backup. Select the options that are right for you.

Once you’ve set these values, you’re good to go. Remember to keep your hard drive plugged into your computer when you have set the backup to be performed. If it’s not plugged in, you backup won’t happen.
Is it worth setting up Automatic Backup in Windows 10?
Backing up your data with Window 10 File History Backup app regularly will prevent you from loosing all your data, should you have a hard drive failure or similar malfunction. But you should be aware that none of the applications you have installed onto your computer will be saved. This includes apps like Microsoft Office. If you do have a system crash then you’ll need to reinstall all your applications again.
If you run into problems setting up Windows automatic backup, you may want to consider using alternative software. In this article you’ll find a step by step guide on how to use EaseUS Todo Backup. This is FREE software that works incredibly well as an alternative to Windows 10 Backup.